You may be a die-hard Mac fan, but let’s face it – sometimes you just can’t resist the allure of playing certain Windows games. Well, guess what? You can actually run Windows on your Mac and enjoy the best of both worlds! In this post, we’ll discuss using Boot Camp Assistant to install Windows 10 on an Intel-based Mac, allowing you to play Windows games on your Mac without compromising its macOS ecosystem.
Bootcamp Windows 10 installation
Before we delve into the details, there are a few essential aspects to consider when installing Windows on your Mac using Boot Camp Assistant.
For starters, Boot Camp Assistant creates a separate partition for Windows, ensuring your macOS remains unaffected. Nonetheless, as a precautionary measure, it’s highly recommended that you back up any crucial data stored on your Mac before proceeding.
Moreover, be sure to check the available storage on your Mac. Installing Windows 10 requires a minimum of 64 GB of space, but we advise having at least 200 GB free. This extra room accommodates buffer space for both your macOS and Windows partitions, ensuring smooth operation. And, of course, if your primary goal is playing Windows games, you’ll want to factor in the space those games will require.
It’s worth noting that if you have an M1 Mac, Boot Camp Assistant won’t be an option. Instead, you’ll need to explore virtualization software like Parallels to run Windows on your machine.
Now that we’ve covered the essentials, let’s talk about the benefits of installing Windows on your Mac using Boot Camp Assistant. By creating a dual-boot environment, you can effortlessly switch between macOS and Windows as needed. This versatility allows you to maintain your preferred Mac workflow while enjoying the vast library of Windows games at your fingertips.
Furthermore, running Windows natively on your Mac’s hardware often results in better gaming performance compared to virtualization solutions. With Boot Camp Assistant, you’ll likely experience smoother graphics, faster load times, and a more seamless gaming experience overall.
In conclusion, using Boot Camp Assistant to install Windows on your Intel-based Mac offers a fantastic solution for gaming enthusiasts who want to enjoy Windows games without sacrificing their Mac experience. Just remember to back up your data, ensure ample storage, and get ready to dive into a whole new world of gaming possibilities!
How to install bootcamp on Mac
You don’t need to install Boot Camp on your Mac – the app comes pre-installed on all Intel-based Macs, and we’ll now show you how to use it to install Windows 10 on your Apple computer.
On the other hand, if you are on an M1 or M2 Mac, then you won’t have the Boot Camp Assistant app on it, and you also won’t be able to manually install it. This app isn’t available for Apple Silicon Macs because the ARM architecture of their M1/M2 chips is incompatible with Windows 10.
How to install Windows 10 on Mac with bootcamp
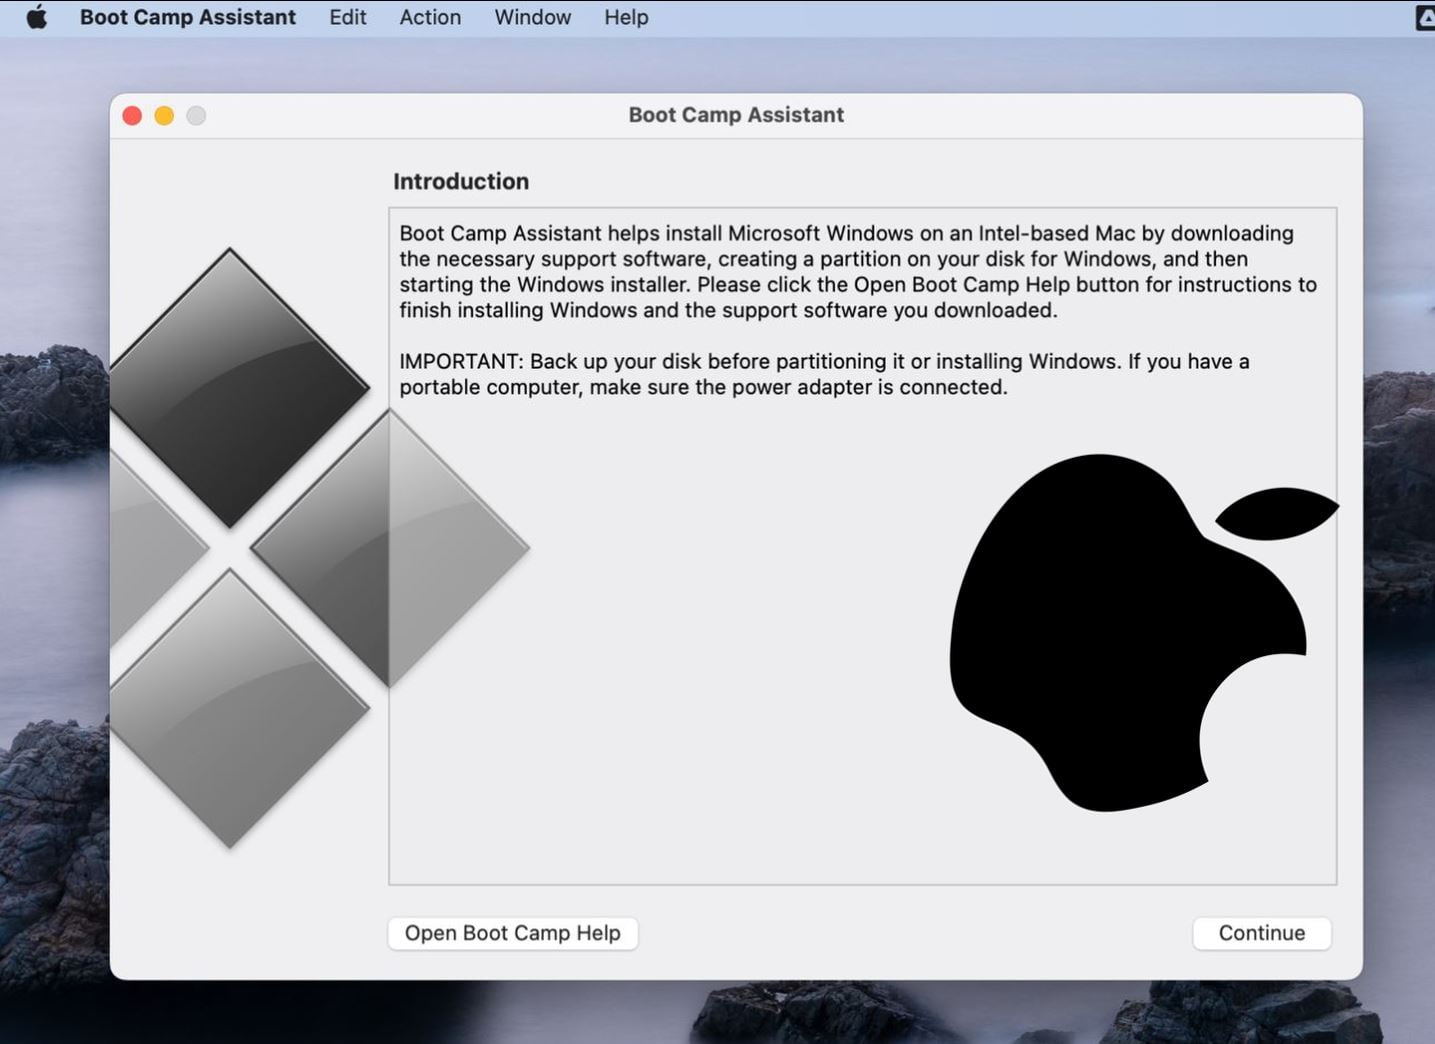
As will be explained in the next guide, to install Windows 10 on your Mac using the Boot Camp Assistant app, you’ll need to download a Windows 10 ISO file which must be loaded in the app, and then you must follow the various prompts and steps to complete the installation. It’s a rather lengthy process, but it’s also relatively straightforward, so as long as you follow our instructions, you should be able to set everything up without any difficulty.
Step 1
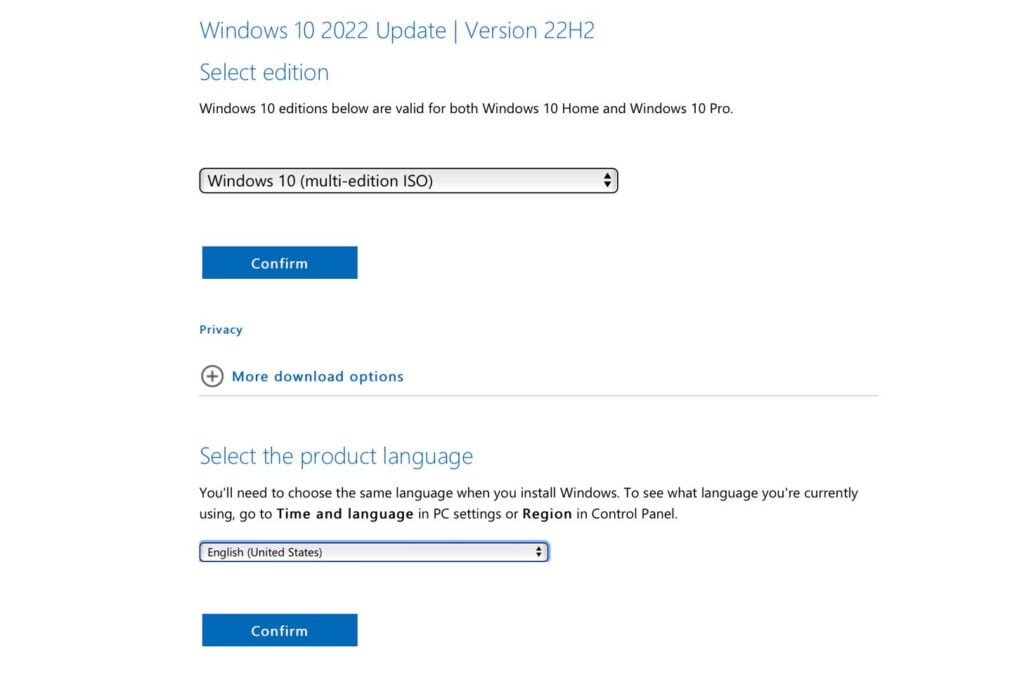
To kick off the process, you’ll first need to download the Windows 10 ISO file from Microsoft’s website. Be sure to select the 64-bit version and your preferred language. This file is quite large, so the download time will depend on your internet speed.
Step 2
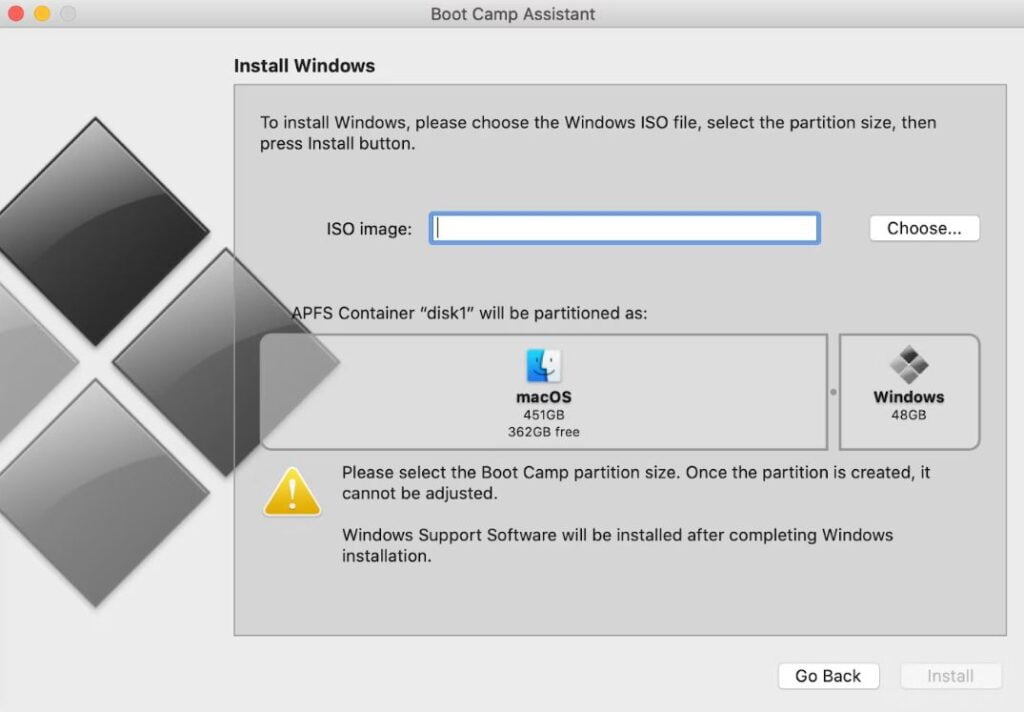
Once you have the ISO file, head over to the Applications folder on your Mac, open Utilities, and launch Boot Camp Assistant. You’ll need to choose the ISO file you downloaded earlier and allocate storage space for both macOS and Windows 10 partitions. We recommend leaving at least 50 GB for macOS and allocating a minimum of 100-120 GB for the Windows 10 partition. If you plan on installing games, adjust the partition size accordingly.
Step 3
After setting up the partitions, click Install, and Boot Camp Assistant will restart your Mac to begin the Windows 10 installation. When prompted, enter your location and preferred language, then proceed to enter your product key or select “I don’t have a product key” if you don’t have one. You can choose between Windows 10 Home and Windows 10 Pro, but for most users, Home should suffice.
Step 4
Agree to the terms and conditions and start the installation process. Remember, if you’re using a MacBook, keep it plugged in during the installation to avoid any interruptions due to battery drainage. The installation might take a while, so be patient.
Bonus tips!
Bonus Tip 1
Make sure your Mac’s firmware is up to date before proceeding with the installation. To check for firmware updates, restart your Mac while holding down the Option key. If updates are available, follow the on-screen instructions to install them.
Once the installation is complete, your Mac will boot into the Windows 10 setup screen. Here, you can customize your settings and create a Windows account with a username and password. You can also choose to set up Cortana, the Windows virtual assistant, or skip this step.
Now that you’ve successfully booted into Windows 10, it’s time to install necessary drivers for your Mac to function smoothly. The Boot Camp Assistant should appear on your screen – follow the prompts to install the required drivers. After the installation is complete, restart your Mac.
For an optimal Windows 10 experience, we recommend performing the following updates:
- Search for “Apple Update” in the Start Menu, install any pending updates, and restart your Mac.
- Go to Settings > Update & Security, select Windows Update, install available updates, and restart your Mac one last time.
Bonus Tip 2
Optimize your Windows settings for gaming. You can do this by enabling Game Mode (Settings > Gaming > Game Mode) and adjusting your graphics settings to prioritize performance over visual quality.
Congratulations! Your Mac is now ready to run Windows 10, and you can enjoy a whole new world of gaming possibilities.
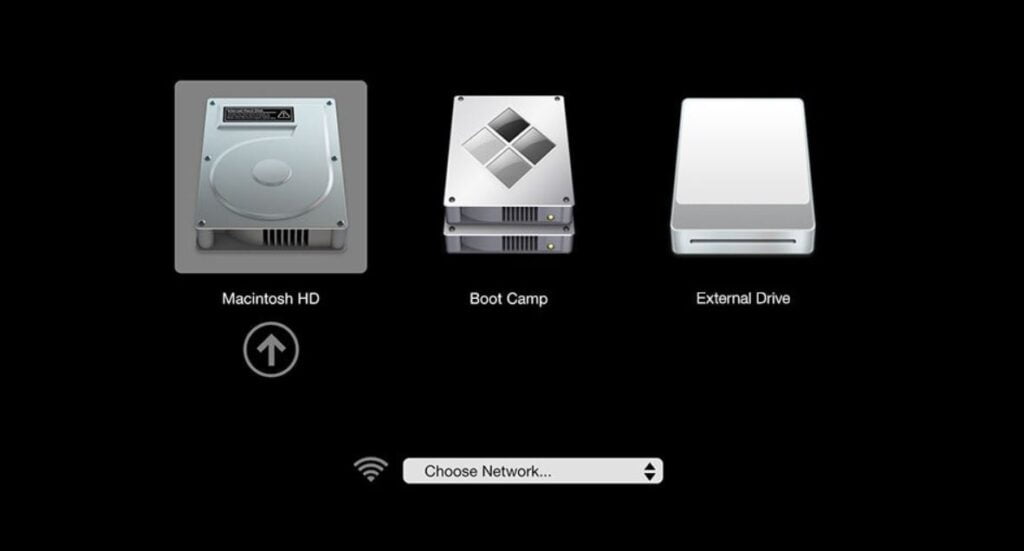
To switch between macOS and Windows 10, simply restart your Mac and choose the desired partition during boot up. Alternatively, while in macOS, go to Apple Menu > System Preferences > Startup Disk, unlock the options by clicking the padlock and entering your password, then select the Windows BootCamp option, and confirm the action.
When you are in the Windows 10 partition and want to go to the macOS one, click the small skewed square icon in the bottom-right, and select the “Restart in macOS” option. If you can’t see the icon, click the small arrow to reveal it among other icons that show up.
Bonus Tip 3
Invest in a good game controller for your Mac to enhance your gaming experience. Many Windows games support controllers, and using one can improve your comfort and precision in gameplay.
Bonus Tip 4
Keep your Windows partition updated with the latest drivers and software. This will help maintain optimal performance and compatibility with new games and software. Regularly check for updates in both Apple Update and Windows Update.
Bonus Tip 5
Pay attention to the system requirements of the games you want to play. Some games may require specific hardware or software configurations to run optimally. Be sure to verify that your Mac meets these requirements before purchasing or downloading games.
Bonus Tip 6
Use a dedicated external hard drive or SSD to store your game library. This will help prevent your Windows partition from filling up quickly and keep your system running smoothly.
Bonus Tip 7
Take advantage of cloud gaming services like NVIDIA GeForce Now or Microsoft xCloud, which allow you to play Windows games on your Mac without needing to install Windows. These services stream games from the cloud to your Mac, eliminating the need for local installation.
Bonus Tip 8
If you find that your Mac struggles to run certain games, consider upgrading your hardware. Adding more RAM, swapping your hard drive for an SSD, or upgrading your graphics card (if possible) can improve performance and enable you to enjoy a wider range of games.
Now that your Mac is set up to run Windows 10, you can explore an extensive library of Windows games, expanding your gaming horizons. Keep in mind that regular maintenance, updates, and optimization will ensure a smooth and enjoyable gaming experience. Happy gaming!
Leave a Reply